Free yourself from the Spotify desktop client with spotifyd
Electron apps are a plague. If you’ve ever wondered why:
- your computer chugs to a halt once more than two of {Slack, Discord, Skype, Messenger, WhatsApp, Signal, GitHub Desktop, Steam, VS Code} are open on the same machine
- scrolling, or playing a GIF or whatever in those apps, is incredibly laggy
- every app download is now 100MB+
- the typing shortcuts you’re used to in macOS Just Don’t Work
then it’s likely that Electron is to blame. I’m writing this blog post on a maxed-out 2016 13” MacBook Pro, and it can barely keep up with all these Electron apps I need to keep running. We can only speculate why all these large companies with enormous engineering resources cannot use the money that I pay them for their services to make software that doesn’t suck, but that’s for another blog post.
Lately I’ve gotten especially annoyed at all of the Electron-based junk running on my machine, since I have to work from home, which means needing to use Docker to run or test out various Linux things, which is another 2 gigs of my laptop’s precious memory eaten away. I decided to look for non-Electron alternative clients for all of those. Enter spotifyd and spotify-tui. After switching software, I have an extra half-gig of memory that isn’t being wasted running yet another instance of Chromium.
In this blog post, I’ll show you how to set up these on your macOS machine. I assume basic familiarity with managing your machine via Terminal. You’ll also need a Spotify Premium account for any of this to work. The wood chipper that is modern society can’t operate without sacrificing a few limbs!
Installing and configuring spotifyd
This is an always-on service (hence the d in its name, for daemon) that will wait in the background and play music requested by whatever Spotify client we choose; in this case, spotify-tui.
First, get spotifyd installed. I’ve added it to Homebrew already, so if you need to get that set up first, go ahead.
$ brew install spotifyd
==> Downloading https://homebrew.bintray.com/bottles/spotifyd-0.2.24.catalina.bo
==> Downloading from https://akamai.bintray.com/3f/3f51d6a45bdb965dcc88e34411949
######################################################################## 100.0%
==> Pouring spotifyd-0.2.24.catalina.bottle.tar.gz
==> Caveats
Configure spotifyd using these instructions:
  https://github.com/Spotifyd/spotifyd#configuration-file

To have launchd start spotifyd now and restart at startup:
  sudo brew services start spotifyd
==> Summary
/usr/local/Cellar/spotifyd/0.2.24: 8 files, 8.5MB
You’ll need to create a configuration file named ~/.config/spotifyd/spotifyd.conf that specifies your login information and other details. You can read the full instructions, but I’ve annotated my own configuration here:
[global]
# Fill this in with your Spotify login.
username = USERNAME

# You'll be using the macOS keychain to specify your password.
use_keyring = true

# How this machine shows up in Spotify Connect.
device_name = "spotifyd"
device_type = "computer"

# This is the default location of Spotify's cache, so just replace LOGIN_NAME
# with your macOS login name (type `whoami` at a Terminal window).
cache_path = "/Users/LOGIN_NAME/Library/Application Support/Spotify/PersistentCache/Storage"
no_audio_cache = false

# Various playback options. Tweak these if Spotify is too quiet.
bitrate = 320
volume_normalisation = true
normalisation_pregain = -10

# These need to be set, but don't need to be changed.
backend = "rodio"
mixer = "PCM"
volume_controller = "softvol"
zeroconf_port = 1234
Create and edit this file with vim, or whatever text editor you prefer:
mkdir -p ~/.config/spotifyd
vim ~/.config/spotifyd/spotifyd.conf
Next you’ll need to add your password to the system password manager. You can do this via the Keychain Access app, or just right in the Terminal:
security add-generic-password -s spotifyd -D rust-keyring -a <your username> -w <your password>
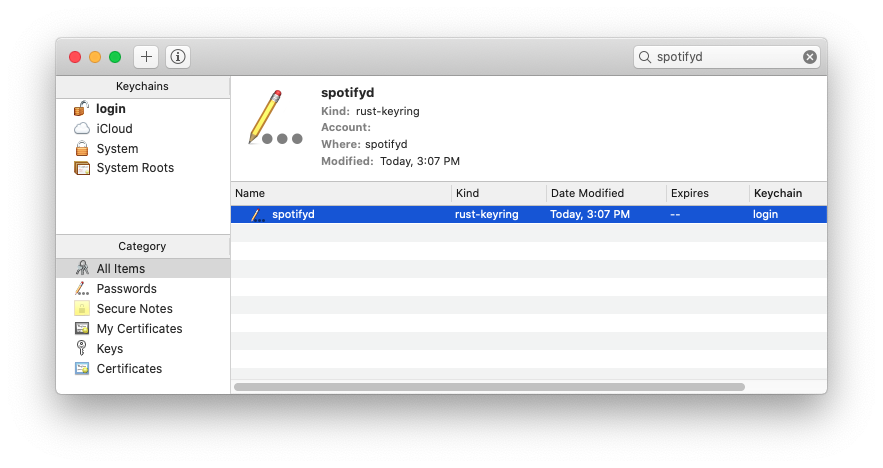
Be sure to use your Spotify username here, not your macOS username. You can confirm that it was added correctly by opening up Keychain Access and searching for spotifyd.

This should be all the configuring you need to do. To test if it worked, first run spotifyd as just a plain app. After you run the following command, grant spotifyd access to the macOS Keychain and Firewall in the pop up that appears:
$ spotifyd --no-daemon
Loading config from "/Users/jonchang/.config/spotifyd/spotifyd.conf"
No proxy specified
Using software volume controller.
Failed to register IPv6 receiver: Os { code: 49, kind: AddrNotAvailable, message: "Can\'t assign requested address" }
Checking keyring for password
Connecting to AP "gae2-accesspoint-b-hzk2.ap.spotify.com:443"
Authenticated as "jonchang" !
Country: "US"
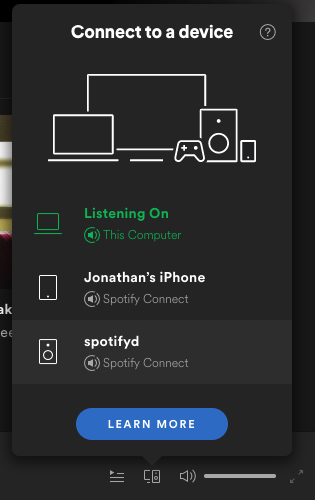
If everything worked correctly, you should similar output to what I have above. Open the official Spotify client on your phone or laptop, and confirm that there’s a new device in Spotify Connect:

Press CTRL-C to stop spotifyd. Now we’ll use brew services to to run spotifyd in the background:
$ brew services start spotifyd
==> Successfully started `spotifyd` (label: homebrew.mxcl.spotifyd)
If you still see spotifyd show up in Spotify Connect, it worked!
Installing and configuring spotify-tui
The Terminal app spotify-tui is how you’ll actually control spotifyd by showing you playlists and giving you playback controls and so on. There’s not that much involved, as the app itself will give you instructions that you can follow quite easily.
You’ll have to click through the Spotify Developer agreement and copy and paste some stuff, but it’s nothing too onerous. Just remember to say you’re making a non-commercial app, and set the “Redirect URI” in the Spotify Developer dashboard and everything should be peachy.
$ brew install spotify-tui
==> Downloading https://homebrew.bintray.com/bottles/spotify-tui-0.19.0.catalina
==> Downloading from https://akamai.bintray.com/35/358ad4bae54d211d8be22d5ca3f46
######################################################################## 100.0%
==> Pouring spotify-tui-0.19.0.catalina.bottle.tar.gz
/usr/local/Cellar/spotify-tui/0.19.0: 8 files, 7.7MB

$ spt

   _________  ____  / /_(_) __/_  __      / /___  __(_)
  / ___/ __ \/ __ \/ __/ / /_/ / / /_____/ __/ / / / /
 (__  ) /_/ / /_/ / /_/ / __/ /_/ /_____/ /_/ /_/ / /
/____/ .___/\____/\__/_/_/  \__, /      \__/\__,_/_/
    /_/                    /____/

Config will be saved to /Users/jonchang/.config/spotify-tui/client.yml

How to get setup:

  1. Go to the Spotify dashboard - https://developer.spotify.com/dashboard/applications
  2. Click `Create a Client ID` and create an app
  3. Now click `Edit Settings`
  4. Add `http://localhost:8888/callback` to the Redirect URIs
  5. You are now ready to authenticate with Spotify!
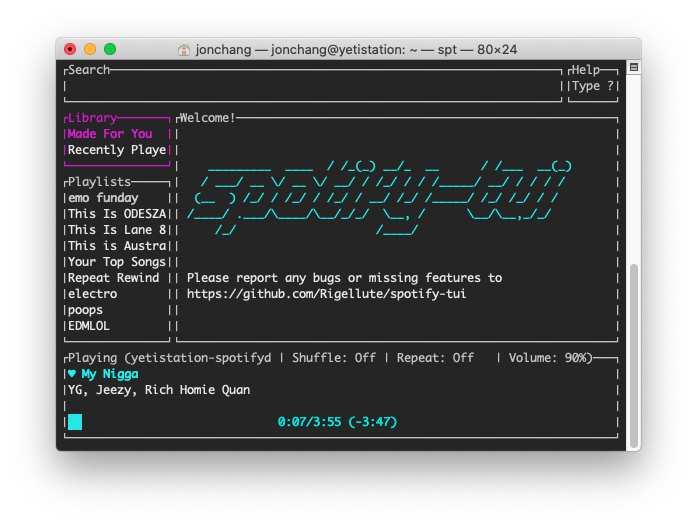
If you’ve set everything up correctly you should see the text interface pop up like so:

To be honest, I used it for a bit, and then decided that I didn’t really like text-mode interfaces all that much. Instead, I just control Spotify from my phone via Spotify Connect, so this hasn’t gotten that much use. Maybe one day I’ll teach myself Swift and write a native macOS Spotify Connect player…
But I’m on Linux!
I dunno, on Linux you’re generally expected to figure things out on your own, so maybe try apt install spotifyd spotify-tui followed by sudo systemctl start spotifyd and see if that works ¯\_(ツ)_/¯
Is this all legal?
Probably not. While it would be pretty weird for Spotify to sue or ask to imprison their own paying customers, I can’t predict how Spotify’s CEO might aim to Maximize Shareholder Value in the future.
Updates
January 2021: spt has been updated to fix a lot of the issues I previously had so now I use it a lot more over the iPhone app via Spotify Connect!
June 2021: I got tired of Spotify and now subscribe to Apple Music instead. Now I can get a gorgeous music discovery and player interface while also doing other things at the same time!